


How To: Start With Calisthenics
Have you just started or are you thinking about starting calisthenics? Are you looking for a good beginner workout? We have added this article to our calisthenics blog especially for you. In this article we will explain, among other things, which exercises you can start with, how to master these exercises and what you should consider further. The purpose of the 'How To: start with calisthenics' is to lay a solid foundation, by mastering the basic exercises of calisthenics. Only when you have mastered these well, you can focus on the more advanced calisthenics exercises, such as the muscle-ups and handstand push-up.
Before you start with calisthenics
When you are just starting out with calisthenics, it is important to build it up slowly and not to rush. Your muscles, tendons and the rest of your body have to get used to the new load. In addition, it is always important to start every workout with a good warm-up. During the warm-up it is important to warm up the muscles and tendons and to get the blood circulation going. So don't skip this. A good warm-up will have a positive effect on your strength and endurance during the rest of your workout. A skipping rope can help with this. We recommend the Speed Rope Survival. The steel ball bearing system makes the skipping rope run smoother and faster than an ordinary skipping rope. It is not for nothing that martial artists use this during their strength and conditioning training.
The five basic exercises of calisthenics
Always remember that it is important to exercise your entire body, including your legs! In this workout, attention is therefore paid to each body part: back, chest, shoulders, arms, core and legs. The calisthenics beginner workout consists of the five basic calisthenics exercises, namely push-ups, pull-ups, dips, pistol squats and L-sits. Make sure you have mastered each step before starting the next step.
1. The push-up
We start with push-ups, or push-ups. It is perhaps the most famous of the five basic exercises we will go through in this article. The push-up mainly requires strength from the chest, shoulders and triceps.
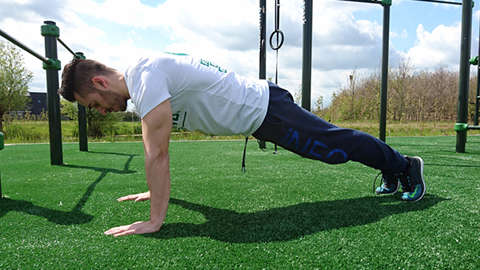
Step 1: Knee push-ups
The first step to master the push-up is to perform knee push-ups. Get on your knees and place both hands shoulder-width apart on the floor. This is the starting position. Now slowly sink down until your chest almost touches the floor. Then press up again to the starting position. Make sure your body stays still throughout the exercise and you only move your arms. You can use these push-up supports to relieve your wrists.
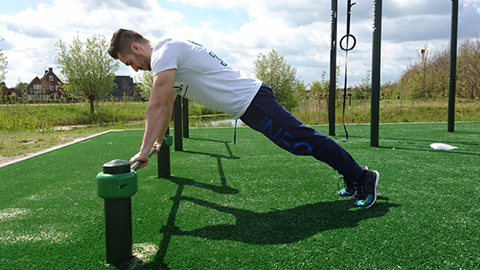
Step 2: Incline push-ups
When the knee push-ups are easy for you, you can proceed to the incline push-ups. To do this, find an object that is higher than the ground. For example a wall, staircase or bench. We use a rod in the example photo below. Stand up straight and place your hands on the chosen object. Keep your body in a straight line and slowly sink down. Then press up again. Start with a relatively high object and slowly work your way up to a lower object until you don't need an object at all.
2. The pull-up
2. The pull-up
The pull-up, also called a pull-up, is an excellent exercise to target the back muscles and biceps. It is an exercise that requires a lot of strength. It may therefore take a while before you master it. So don't give up right away and perform the following steps as best you can. Only then will you succeed!
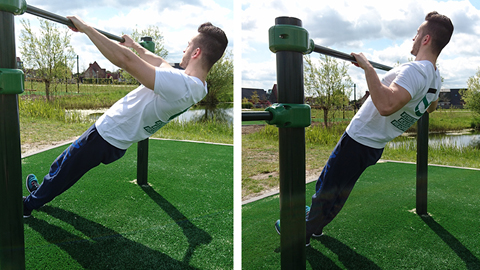
Step 1: Australian pull-ups
We start with the Australian pull-ups. This variant of the pull-up is an excellent way to work towards the pull-up. With your back pointing to the floor, hang under a horizontal bar. Just like you can see in the picture below. Grasp the bar slightly wider than shoulder width. This is the starting position. Draw your chest towards the bar. Then slowly lower back to the starting position. The lower the bar you use, the more difficult the exercise will be. Tighten your abs during this exercise and make sure your body is in a straight line.
Step 2: Australian pull-ups small/wide grip
We stick with the Australian pull-ups for a while, but now switch grip positions. Stand in the same position as in the first step, but hold the bar very wide or very narrow.
Step 3: Resistance band pull-ups
In this step we are going to use resistance bands. The Pull-Up Pack to be precise. This is a specially composed package that will help you perform the perfect pull-up step by step. The package consists of three resistance bands, each with a different resistance. Attach the band to a high bar. Then step on the band with both feet and grasp the bar with your hands. Pull yourself up slowly and in a controlled manner. Hold this position for one second and then slowly lower yourself back down. You start with the strongest tire in the package and work towards the lightest tire. When you can do a few reps with the lightest band, it's time to do the pull-up unassisted.
3. The dip
The third basic calisthenics exercise is the dip. You usually perform dips on two parallel bars, but you can also use, for example, two chairs. Make sure that they are sturdy and stable. Dips are an excellent exercise for your triceps and chest muscles.
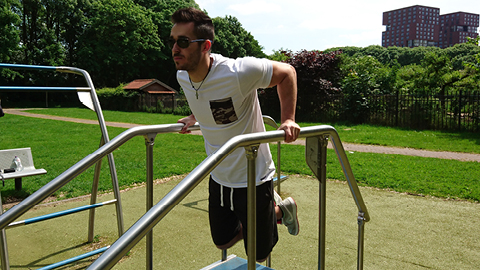
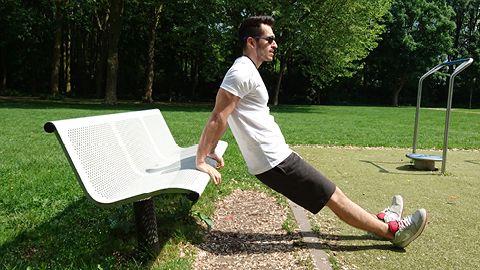
Step 1: Behind the back dips
First, find a chair, staircase or bench on which you can perform the 'behind the back dips'. With both hands behind your back, put your palms on the object, just like in the photo below. Now slowly sink down to the point that your elbows are at a ninety degree angle. Only use your arms and keep the rest of your body still. Now push yourself back up, so that you get back to the starting position.
Step 2: Behind the back dips with elevated legs
This exercise is a challenging variation of the first step. You perform the 'behind the back dips' again, but now you put your legs on an elevation.
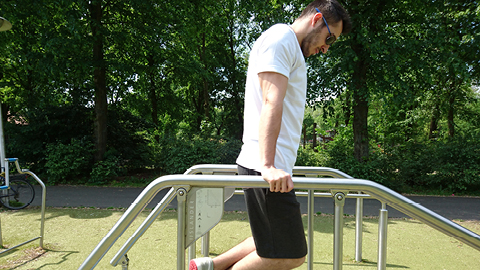
Step 3: Negative dips
Time for the real work! Stand between two parallel bars. You can use the Adjustable Equalizer for this. Put your hands on the bars. Jump up so that both feet are off the ground and your full body weight is supported on your arms. This is the starting position. Now lower as slowly as you can until your elbow is at a ninety degree angle and your feet are touching the floor. Then jump up again so that you get to the starting position. You will likely drop down quickly and uncontrollably at first. The more you perform the exercise, the better. Finally, try to push off less and less hard when you want to get into the starting position. This is to use more power from your arms instead of your legs.
4. The pistol-squat
We have come to the legs. Many find this the least enjoyable part of the body to train. Still, it is very important not to skip this. Exercising your legs ensures that more growth hormones and testosterone are released in the body. This stimulates muscle growth throughout the body. The pistol squat is a one leg squat. The other leg points straight forward, making the body look like a gun. Hence the name pistol squat.
Step 1: Bench Squats
We start easy. Find a playpen, chair or just a park bench. Stand in front of the object with your back to it. Put your feet shoulder width apart. This is the starting position. Now slowly bend your knees until you are sitting on the bench. Then you get up again so that you come back to the starting position. Make sure your knees are not too far over your toes and try to push from your heels as you squat. Find a lower and lower object until you can reach deep enough that your knees are at a ninety degree angle.
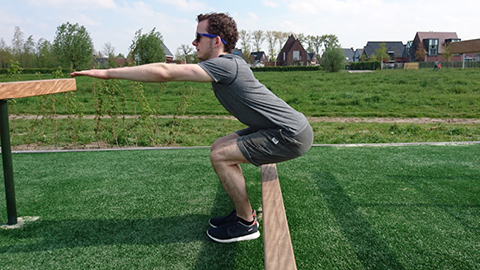
Step 2: Explosive squats
We are now removing the object from behind us. Squat down as deep as you can. Then jump up as explosively as possible, so that your feet are off the ground. As this improves, try to pull in your knees as you jump up.
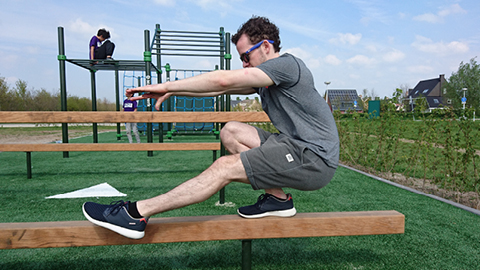
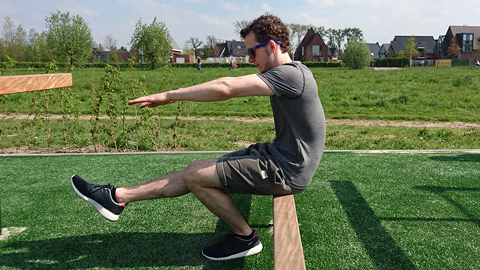
Step 3: Bench pistol-squats
In this step we again use a bench, box or chair. Stand on one leg and extend the other leg in front of you. This is the starting position. Now squat slowly down until you are on the object. Go back up to the starting position. To maintain your balance, you can stretch your arms forward during this exercise.
Step 4: Assisted pistol-squats
Now get the object from behind you. Perform the pistol squat while supporting yourself with one arm on a pole or resistance band. Try to lean less and less on your arm and get more power out of your leg. Do this until it succeeds without additional support.
5. The L-sit
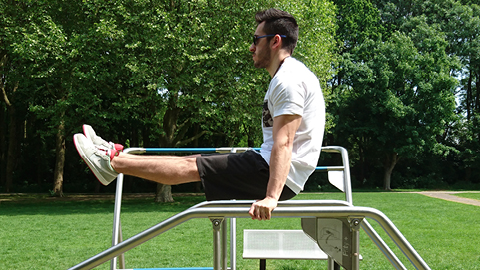
The L-sit is a static position that you hold for a few seconds. Like the dips, you perform the L-sit on two parallel bars. You can use the Adjustable Equalizer for this again. The L-sit requires strength in the abdominal muscles, but your shoulders and arms must also be strong enough to hold the body weight. The name L-sit comes from the posture you adopt. It resembles the letter “L” from a side view.
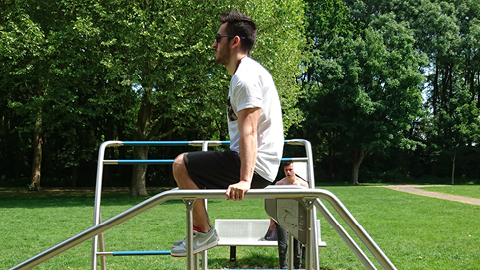
Step 1: Knee raises
Stand between two parallel bars. Grab them with both hands and jump up. You have your legs hanging straight down and you rest on the bars with outstretched arms. This is the starting position. Bend your knees and bring your legs up slowly and controlled, to the point that they are parallel to the ground. Now lower your legs back to the starting position.
Step 2: Tucked L-sit hold
Do the first step again, but try to hold the legs at the top for a few seconds.
Step 3: Leg raises
Do the first step again, but instead of bending your knees, now keep your legs fully extended.
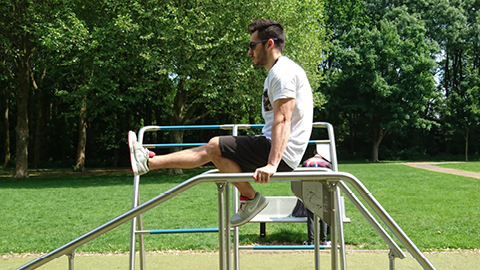
Step 4: Single leg L-sit
You are just one step away from a full L-sit. Assume the starting position, but with the legs out in front of you and your knees bent ninety degrees. Fully extend your left leg while keeping the other leg bent. Try to hold this position for as long as possible. If this is no longer possible, you switch legs. A set of Steel Parallettes can be useful for this exercise.
De eerste stap is gezet. Je hebt de 'How To: starten met calisthenics' gelezen. Als het goed is ben je een stuk wijzer geworden en weet je wat je nu te doen staat. Tijd om te beginnen! Ga naar buiten (of binnen) en ga ervoor. Wil je weten hoe je deze oefeningen in een workout gebruikt? Lees dan het artikel: calisthenics beginner schema. Daarin geven wij je twee soorten beginner trainingsschema's, waarin je precies ziet hoeveel sets, reps en oefeningen je moet uitvoeren. Zet door en geef niet op totdat jouw doel bereikt is. #ReachYourGoal
Er wordt steeds benoemd dat er een goede warming up nodig is. Goed is vrij relatief. Is er ook een link die verwijst naar deze goede, specifieke warming-up?
Wat een mooi stuk, duidelijk in stappen. Juist de eerste oefeningen zijn belangrijk om de kracht te verkrijgen voor de oefening. Nog voor het beginnen met calisthenics is vooral belangrijk dat pezen voorbereid worden op de veel grotere belasting van de gwrichten. Zo heb ik een maand uitgetrokken om zowel lenigheid als belastbaarheid te verhogen. Zp bereiken we onze doelen!
@Frank: Op de volgende pagina vind je twee schema's waarin wordt uitgelegd hoe vaak en hoe lang je deze oefeningen dient uit te voeren. https://www.streetgains.nl/blog/calisthenics-beginner-schema
oh laat maar al gevonden
Hoe vaak of hoe lang doe je een oefening? Tot het niet meer lukt? of mik je op 3x5? 3x10? En dagelijks? Of rustdagen er tussen? Je lichaam overbelasten lijkt me ook niet wenselijk.
Dankjewel! Vind het erg intressant en kwam dit toevallig tegen! Ga vanmiddag hier in het park eens aan de slag!
Thanks! Ik heb nog een hoop te leren als ik dit zo zie. Geeft wel veel motivatie! Vanmiddag ga ik weer naar het park om te oefenen.
@Cynthia In dit artikel vind je meer informatie over een goede warming-up: https://www.streetgains.nl/blog/calisthenics-warming-up